Google Dynamic DNS setup
This was mildly fiddly so I'm putting information here.
First set your home router to pass ports 80 and 443 to the target machine. Verify that you have done this successfully by trying to connect from a machine that is outside your LAN, e.g. a mobile phone using cell rather than wifi, to your (current) public IP. To do this, I use Python's built-in http server:
cat 'hello world' > index.html
python3 -m http.server
Connect to your IP from outside your LAN and you should see hello world in your browers. Assuming that was successful and that your server is a Ubuntu/Debian-based machine, install ddclient:
sudo apt install ddclient
It will guide you through setup but for me it did not work. You might be tempted to use the google domains option but this did not work for me. Try it anyway and if/when it fails use something like the following. Do not include http:// or https:// in the <your domain> portion.
protocol=dyndns2
use=web
server=domains.google.com
ssl=yes
login='<google-generated-login>'
password='<google-generated-password>'
<your domain>
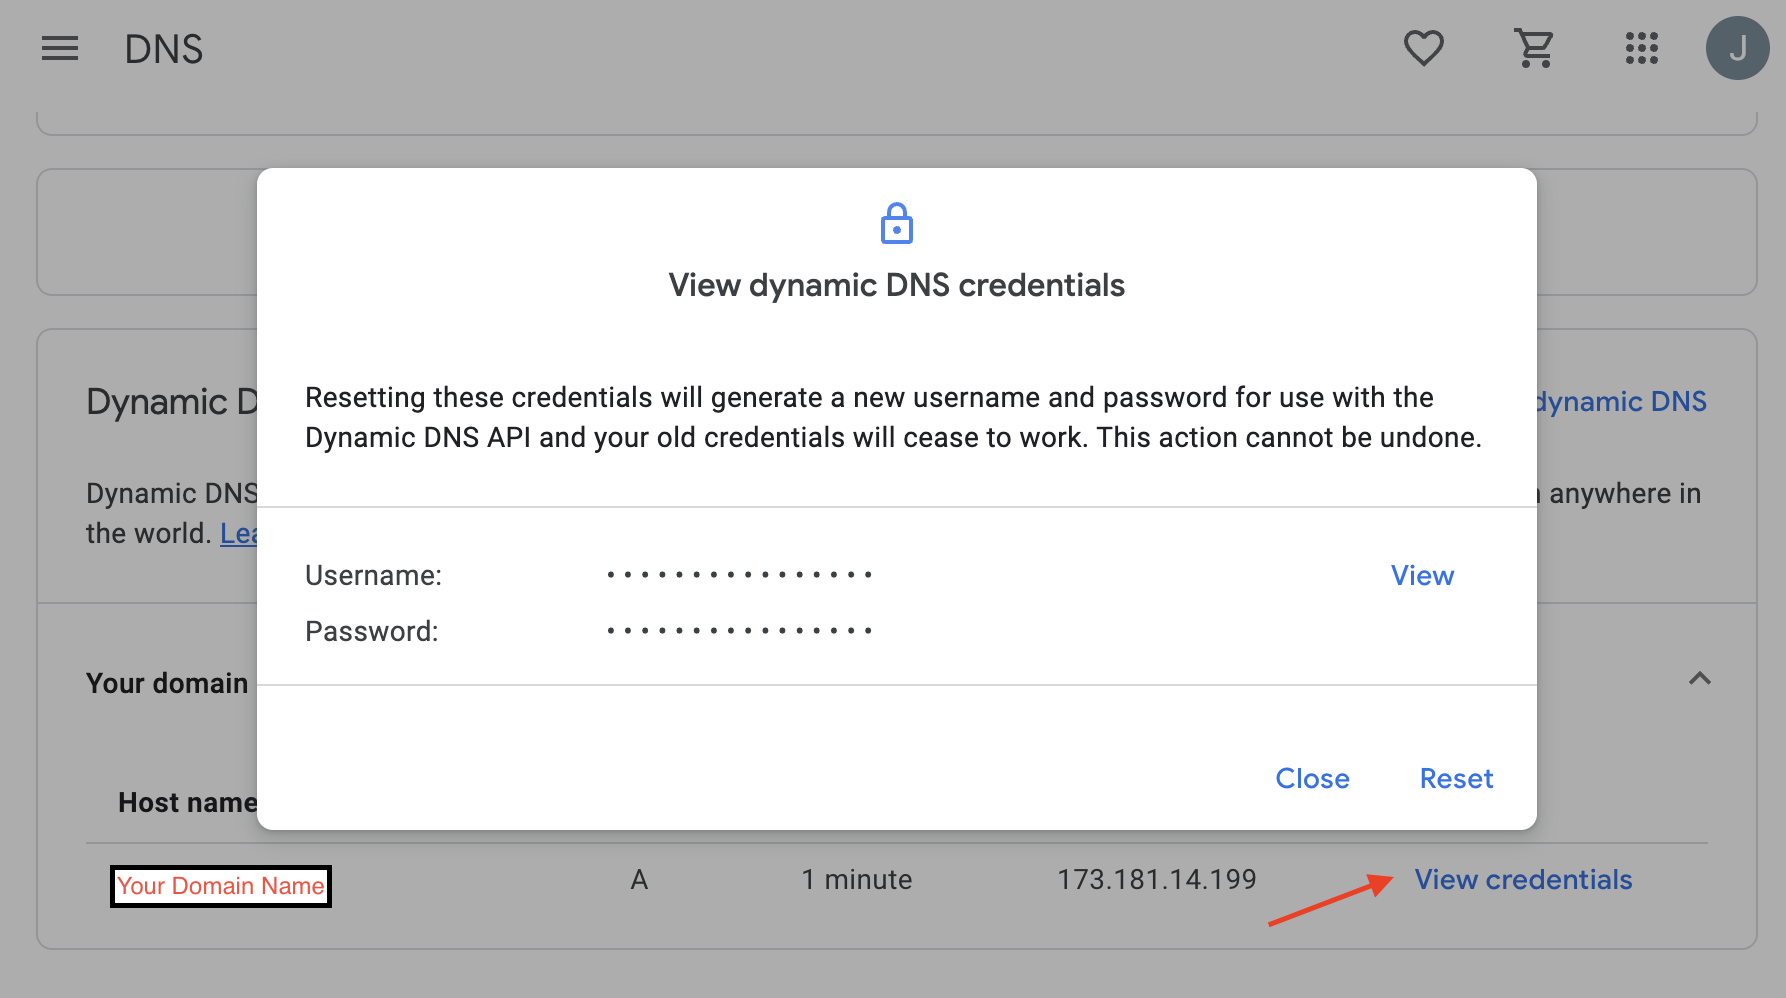
The login and password fields are not your Google account username and password. They are generated by Google. Open your domain in Google domains and go to the DNS section, then scroll down to and enable Show Advanced Settings and then expnd the Dynamic DNS collapsed panel. Then click View Credentials (red arrow below) and you should see the following. You can get your login/password by clicking View on the panel that pops up.
You can then run:
sudo service ddclient restart
to restart ddclient and run:
sudo ddclient query
to perform an update. Refreshing the google domains page for the domain should ideally show that the record has been updated. Using your external-to-your-LAN-machine, you should now